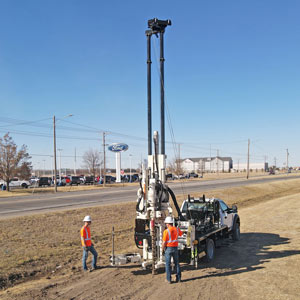
Video Summary:
The 3100GT can be setup for CPT by using a few simple anchoring components: rod guide, anchor, and anchor bridge. Automatic head feed rate control advances the cone at a steady 2 centimeters per second specified by ASTM Standard D5778. This provides hands-free operation during advancement of each rod. Switching from geotechnical drilling to pushing CPT is fast on the 3100GT. Running CPT is safe and simple.
Contact Us
1835 Wall Street
Salina, Kansas 67401
Phone: (785) 825-1842
Transcript
Hi, I’m Troy Schmidt with Geoprobe®. We’re here today to show you anchoring of the 3100GT. The purpose of this video is to show you the ease of operation and how this is done. And the versatility of the rig to be able to switch from geotechnical drilling over to CPT with a simple anchor package. And this will make it easy for any operator to move the machine, move the mast into position, and quickly set anchors in place.
One of the things we need to do is use the auger drive to advance an anchor just like you would an auger except we’re going to screw an anchor in with this drive. And then we have a pushing bracket we’re going to use for pushing the rods for advancing any tooling into the ground as we do CPT or other sensing systems.
The anchoring package for the 3100GT includes these components I have here on the ground. First we’re going to have a rod guide thats really handy for putting between the toes for advancing the cone or any logging tool to help us stay centered and stay straight and give some rod support near the ground.
The next element is an anchor itself - common anchor with a pinning bracket that we use for all of our rigs for anchoring. The last item is the anchor bridge and that is used to hold the foot to the ground as we begin to do our push.
To begin setup, the drill mast is extended out from the rig. A 15 in. diameter anchor is advanced using the standard auger drive on the 3100GT. The drill mast is then retracted back towards the rig. Next, a rod guide is attached between the toes to keep the tooling centered as it is advanced. The drill mast is raised above the top of the anchor and the anchor bridge is slid onto the foot.
Using the mast dump function, the anchor bridge is lowered over the anchor. A pinning bracket is then connected to the anchor to hold the foot to the ground for pushing. The wiggle and oscillation of the drill mast allow for slight adjustments during setup.
Once anchoring is complete, the CPT logging equipment is setup. A stringpot tracks vertical movement of the head to record logging depth. The end of the string is secured to the drill mast. The CPT microphone is attached to the drill head. This is used for pushing the cordless CPT system. A corded CPT system can also be run with the 3100GT by using a seismic CPT push / pull cap.
The rig is now setup to begin pushing the CPT cone. Automatic head feed rate control advances the cone at the steady 2 centimeters per second specified by ASTM Standard D5778. This provides hands-free operation during advancement of each rod. Rods are added until the desired logging depth is reached. A rod bushing is placed on the rod guide to to keep the rod centered while pushing. The 3100GT has 15 tons of push and 24 tons of pull.
Once logging is complete, the CPT system is ready to be retrieved from the subsurface. The string pot and microphone attached to the drill head can be removed at this point. A seismic CPT push/pull cap is attached to the drill head. A pull cap is placed on the top of the rod string. This allows for pulling each rod interval. The pinning bracket is removed from the anchor. The drill mast is then extended to remove the anchor bridge from the foot. Next, the rod guide is removed. Using the auger drive, the anchor is removed. This completes CPT logging on the 3100GT.
So what we showed you here today was anchoring with the 3100GT and the versatility of the rig to be able to switch from geotechnical drilling over to pushing CPT with a simple anchoring package and simple installation. If you have any questions about this rig or CPT, please call us at Geoprobe®.


